Plastic Free Rice Balls
These rice balls are made using a silicone mold instead of plastic cling wrap
Servings: 8 rice balls
Equipment
- 1 silicone mold with about 2-3/4" squares (can also use a silicon muffin tin, the rice balls will just be smaller)
- 1 pan with lid
Ingredients
- 1 1/2 cup sushi rice
- 1/2 tsp salt
- 1 serving beef or chicken or tuna salad
- 4 sheets nori sushi sheets
- 3 cups water
Instructions
- Rinse the rice and add to the pot with water and salt.
- Heat rice to boiling.
- Once boiling, cover rice with lid and turn stove temp to low.
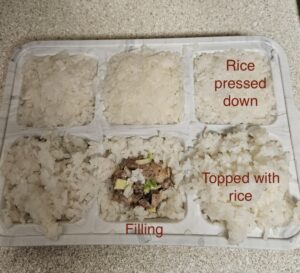
- While rice cooks, prepare the filling. (I used the beef salad in the pics).
- When rice is done cooking (about 30 minutes) loosely fill the silicone mold and let rice cool a few minutes.
- Wet your hands with water to help keep the rice from sticking to them. Press the rice down into the mold forming a well/cup in the center of each one.
- Spoon the filling into the rice "cups" you just made leaving a little room at the top.
- Top off the filled rice "cup" with more rice, about a 1/4 or 1/3 cups worth.

- Wet your hands again with water and press the rice till it is just above the top of the mold edge.
- Let rice balls cool before turning them out of the mold.
- When you turn the rice balls out of the mold, they should all hold together. If not, you will need to put them back into the mold and re-press them.
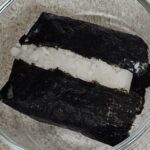
- Use half a sheet of nori sushi wrap to fold around the rice ball.
- Eat warm or store for later using your storage method of choice.
Notes
I don't recommend storing your rice balls for much more than 2 days.
