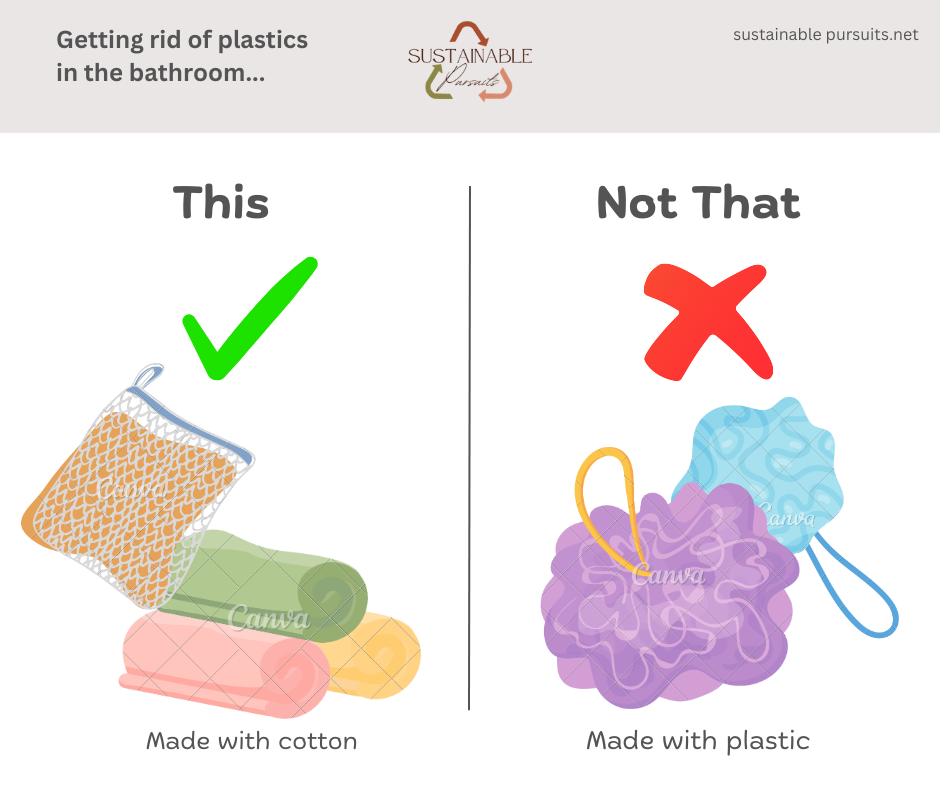
With this month’s plastic-free focus being on the bathroom, what better craft project than homemade washcloths and their variations! These washcloths are a reusable, natural alternative to those plastic loofahs hanging in the shower. So you’ll be cutting down on plastics in your home and in the waste stream.
Plus, when you make your own washcloths (or their variations) you can control what type of materials you use. The washcloth patterns below use 100% cotton yarn that you can find at most craft stores. Using all cotton means that the cloth should be compostable once it gets worn out.
Other benefits of homemade washcloths
So we’ve covered a bit about how these homemade washcloths are better for the environment. But I’d like to mention one more thing I like about these homemade washcloths/sacks/mitt. And that is how nice and sudsy they get because of their texture. Or at least more sudsy than the regular washcloths. Which is why I like to recommend them as a replacement for loofahs.
How to use these washcloth variations
I’ve been making cotton washcloths for awhile now and I wanted to challenge myself with something different for this month’s challenge. So, I started making soap sacks, aka soap savers. Which then morphed into a soap mitt.
If you’ve never used a soap saver/sack before here’s the general run-down of how to use one –
- Put the soap in the sack
- Use the soap and sack to wash up
- When finished, take the soap out of sack and rinse between uses
- Hang the saver/sack to dry
Why try different variations for the homemade washcloths?
Personally, I found it difficult to wash with the whole bar of soap when using the soap sack. And I was thinking about just going back to the regular washcloths. But as I was rinsing out the soap sack, I realized how well it worked as a mitt. It’s like using a washcloth but better! To use the soap mitt, you just place it over your hand and use it like a washcloth.
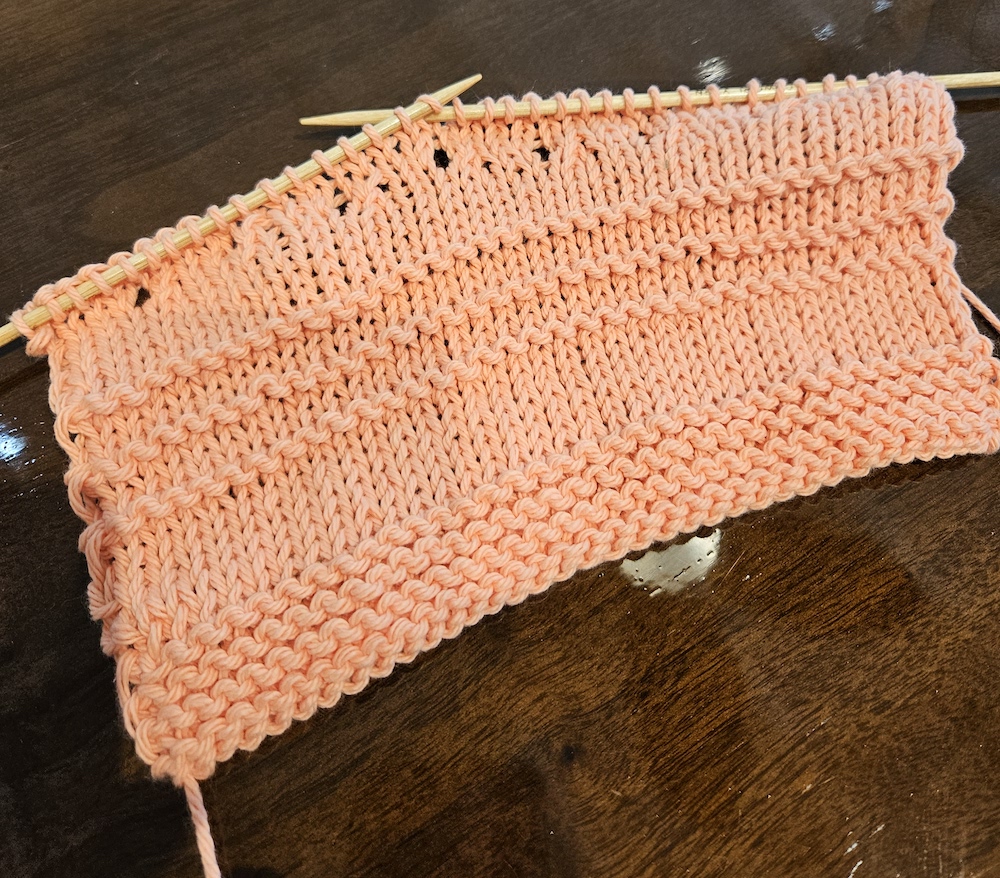
Simple washcloth pattern to use for variations
There are several soap sack patterns online, and after trying a few it seemed best to just keep it simple. Below you can see the pattern I ended up creating and it’s easy to make variations to it.
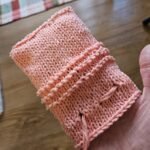
I don’t know if I can call my pattern a mitt because I don’t make a thumb. So, really my washcloth “mitt” is more of a pouch than a proper mitt. But you still use it more like a mitt, it’s just easier to make.
Also, you’ll see that the main difference from my soap mitt and a soap sack is the eyelet row. With the soap sack you make more eyelets to close the pouch. With the soap mitt, I just made 2 eyelets so you can attach a string to hang the mitt on a hook.
You can make the soap saver on double pointed needles but I found it easier to make it flat and then sew up the edges.
Quick and Easy Washcloth “Mitt”
Equipment
- 1 pair of size #6US (4.0mm) knitting needles
Materials
- .9 oz Cotton yarn – worsted weight (Lily's Sugar n'Cream or something similar) 1 skein will result in about 4 mitts.
Instructions
- Cast on 36 stitches leaving about a foot of yarn for the tail.
- Knit each row until you reach 5 inches (4.5" or 4" if you have smaller hands)
- For the next row (making the eyelets): knit 3, knit 2 together, yarn over, knit to final 5 stitches, knit 2 together, yarn over, knit remaining 3 stitches.
- Knit 5 more rows
- Cast off leaving about 1 foot of yarn for tail
- Using tail ends, sew up sides and bottom with mattress stitch
- Tie off or weave in remaining tail ends
- Using 3 pieces of 7" yarn form a braid and thread through the eyelets. Tie a knot in the braid to secure it and you're done!
Somewhat Fancier Soap "Mitt" Variation (but still simple)
- Cast on 36 stitches leaving at least a foot of yarn for the tail.
- Knit 6 rows.
- Make 1" in stockinette stitch (K row, P row) ending on knit row.
- Knit next row (instead of pearl) and repeat previous step. Repeat 2 more times.
- The mitt should be about 5" long.
- For the next row (it should be on a knit row): knit 3, knit 2 together, yarn over, knit to final 5 stitches, knit 2 together, yarn over, knit remaining 3 stitches.
- Continue stockinette stitch for 5 more rows.
- Cast off, leave about 1 foot of yarn for tail.
- Using tail ends, sew up sides and bottom with mattress stitch.
- Tie off or weave in remaining tail ends.
- Using 3 pieces of 7" yarn form a braid and thread through the eyelets. Tie a knot in the braid to secure it and you're done!
Notes
If you are looking for crochet or fancier types of washcloth patterns, be sure to check out Ravelry or Yarnspiration’s pattern lists.